Today I wanted to talk about VMware Converter Standalone which has been a constant in my bag of tricks for a long time. VMware Converter is a tool that allows you to convert a Physical Machine to a Virtual Machine which can run on a VMware ESXi host or VMware Workstation / Player. You can also use VMware Converter to resize Virtual machines or even convert them from Thick Provisioned virtual disks to thin.
Before VMware Converter was a free Standalone product, it was an add-on to vCenter (version 3-4.1 if my memory was correct) that was licensed by VMware. It enabled you (much like it does now) to convert a physical machine and turn it into a Virtual Machine. Pretty Sweet huh?!
Somewhere between vSphere 4 and 5 they decided to remove it from vCenter as an add on and make it a a separate product and best of all made it free!
During the installation process you are now asked to decide if you are doing a standalone installation or a Client Server install. I will probably do an install guide for this later so I can discuss further as both have their merits.
If you are interested in getting a copy of VMware Converter Standalone you can follow this link. It will also be available on the Tools page once this post goes live.
I hope you found this post helpful and please check back later for more articles.
Showing posts with label VMware Workstation Pro. Show all posts
Showing posts with label VMware Workstation Pro. Show all posts
Friday, May 10, 2019

Friday, March 15, 2019
How to install ESXi 5.5
Continuing the saga of building out my VMware home lab I will be covering the process off installing ESXi 5.5 as a Virtual machine in my environment. As stated in my previous posts, I am a VMUG Advantage Member so I do have access to newer versions of VMware software.
That might make you wonder why I am going with ESXi 5.5, well you are going to have to wait and see what my plan is for that.
Lets get started with the installation of ESXi 5.5
Once the ESXi .ISO has been booted up on the machine you will be presented with this screen.

Press Enter to boot, or let the countdown continue and it will boot automatically.

The ESXi installer will load into memory. It may take some time for this to complete depending on how much Memory you have on your machine, so your mileage may vary.

After all of this you will be presented with the ESXi 5.5 Welcome Screen. Press Enter to continue.

Press F11 to Accept the End User License Agreement to continue on.

Once you press F11 the install will start scanning the System it is installing on to see what Storage is available.

On the next screen you will be presented with a list of Datastores that are available to you to install ESXi on. Select the Datastore that you want to use and press Enter.

You will then be asked to select your Keyboard layout. Press Enter to continue.

Now you will have to set the Root Password for the OS. Once you confirm the password press Enter to continue.

The ESXi Installer will then can your system again .

You will then be asked to Confirm your decision to install ESXi on the datastore you selected. Press F11 to continue.

Now the installation will begin, again your mileage may vary as to how long it will take to complete.

Once the installation has been completed you can press Enter to reboot the machine to complete in installation.

After the reboot has been completed and the system boots up you will be presented with the following screen.

This concludes the ESXi install guide. I hope you found this helpful an please check back for more updates to come.
Friday, March 8, 2019
How to Create a Virtual Machine using VMware Workstation Professional 15
Continuing on from my previous post, I wanted to go through the process of creating a Virtual Machine with VMware Workstation Professional 15. Mostly because the last time I did a how to create a VM post, it was a few years ago and it was vCenter 5.5, and because I will be building off of this for future posts.
So let's get started.
Launch VMware Workstation Professional 15 Pro and you will be presented with the following screen.

You will want to click on the Create a New Virtual Machine Button (Circled in Red below)

That will launch the New Virtual Machine Wizard.

From here you will want to select either Typical or Custom for your installation configuration. For the purposes my installation I am going to go with a Custom installation.

After selecting Custom click Next. You will be presented with the option to choose your Virtual Machine Hardware Compatibility.

As as you can see from the drop down menu below there are many options to choose from. Each option has different compatibility requirements which also brings different limitations. Also remember that Newer Hardware Versions will not be compatible with older versions of VMware Workstation, so if you have to move between versions please keep that in mind.

For our purposes I will be Selecting ESXi 6.5, which should allow me to import this VM into an ESXi environment without needing to use VMware Converter. I will probably cover this in a later post.

After making your selection, click Next to specify the OS for your Virtual Machine. You can either select and Installer disk, and Installer Image File (.iso), or I will install the Operating system later. For the purpose of this post I will be installing from a Image File (.iso).

Click on browse to be prompted to select your Image file.

Select your installer Image File and click Open to continue.

Depending on the .ISO you are using as the installer, VMware Workstation will attempt to determine what Operating System (OS) you are trying to install. This will also provide recommended settings based on your OS.

Click Next to continue on to name your Virtual Machines and specify where I want the Virtual Machine files to be located.

Click Next to move on to set Processor Configuration. The Processors are capped at the total number of Virtual CPUs available on your machine. If you try to over provision your processor you will get a Error message.

Click Next to continue on to set the Memory for the Virtual Machine.

As you can see there is a "Recommended Memory" setting when you get to this screen. This is gathered from the .ISO check a few slides back. Click Next to continue on.

For Network Type you have 4 Options as seen above. The default is to use network address translation. This setting is all dependent on how much access you want to give to your VM. Do you want it to be accessible to or from your network? Perhaps you are setting up a VM to test some dangerous program? All these things you need to consider before clicking Next to continue.


On the next screen you will be presented with options for Virtual Disk Type. Depending on what you will pick will determine compatibility with other Hypervisors in the future and can cause a real headache for someone else down the line if you don't consider your options. I will cover that in a different post. For my purpose I will be sticking with SCSI which is recommended and is also the default selection.
Next you will be asked to Select a disk from the following option.

As this is a new Virtual Machine I will be selecting Create a new Virtual Disk and Clicking Next.
You will then be presented with the following screen where you can specify the size of your Virtual Disk, if you want to Thick Provision it, and how you would like the file stored.

Make you selection and Click Next to Continue. Next you will be able to Name the Virtual Hard disk and Specify what storage it will be installed on.

Click Next to continue. Review your settings and Click Finish to continue.

Friday, March 1, 2019
How to install VMware Workstation Professional 15
In my previous post about my new Home Lab spoke about installing VMware Workstation Professional 15. I wanted to follow up with this installation guide.



Once you get the installer downloaded, start off by double clicking it to run it.

At the Welcome screen, click Next to continue.

On the End User License Agreement, Check the box that says I accept the terms in the License Agreement.

And click Next to continue

On the Custom Setup screen, check the box that says Enhanced Keyboard Driver. Now this will require a reboot of your PC when it is done so just be aware of that. Click Next to continue.

On the User Experience Settings screen, Click Next to Continue.

On the Shortcuts screen, select which shortcuts you would like to have created as part of the install and click Next.

On the Ready to install VMware Workstation Pro Screen, click Install.

The Installation will run for a few minutes until it is complete.

Once the installation has completed you will have a chance to Finish the installation or Apply your License now. If you choose to Finish the installation, you will still be able to use the application, but you will be using a Trial License. I will be continuing on with applying the license.

Enter your license key and click Enter.

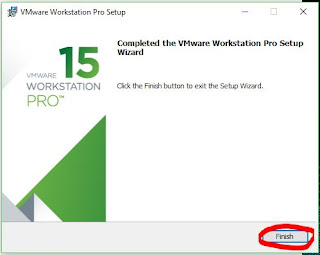
Once you click Enter, you will be presented with the Completed Installation Screen. Click Finish to end the installation. You will then be prompted to restart your PC.

Click Yes to restart your PC, and once it comes back up, you are good to go!
I hope you found this post helpful, and stay tuned for more helpful guides and tips.
Subscribe to:
Posts (Atom)
-
 In a previous Post I mentioned an issue that I had with a Certificate template on my Internal Enterprise CA not showing up when I tried to r...
 -
So I have been looking for ways to expand my knowledge with PowerCLI. This whole effort came about from going to VMWorld 2019 in San Francis...
-
I have recently been working on a asset inventory issue where I was provided a list of serial numbers from our hardware vendor and I was ask...